10 March 2019
Conclusion
Ultrasonic inspection of welds for welding flanges, bosses and nozzles
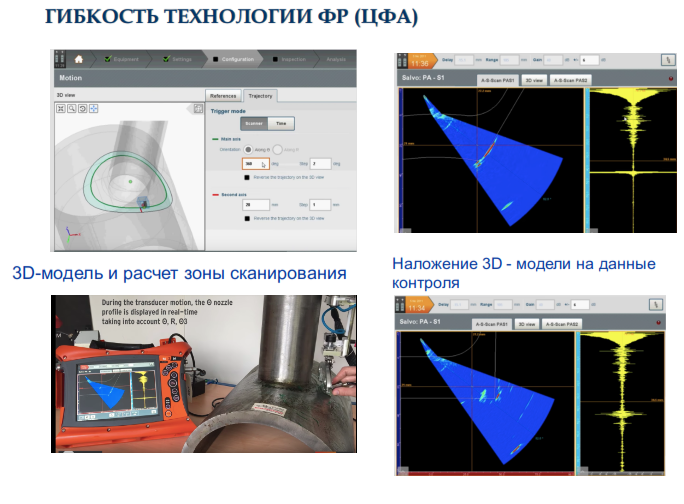
The presentation describes the main difficulties and ways to solve them during ultrasonic inspection of welded joints of welding pipes, flanges and bosses. The possibility of using the technology of phased antenna arrays for narrowly specified welds is shown. The reliability of the control is achieved by selecting the parameters of the phased array and the scanning zone, building a three-dimensional model of the object of control. This technology can be implemented using AUGUR ART or GEKKO flaw detectors.
The design of the weld:
The design of the weld:
- Corner seam with full penetration
- The surface of the welded element is not always smooth enough
- The cutting form is variable
- Access from the side of the welded element is limited or absent: the control scheme from the side of the pipe (shell) is not described by GOST R 55724 and GOST R ISO 17640
- Inspection from the side of the pipe with a large thickness of the pipe is difficult (large thickness and a decrease in the amplitude of the signal when reflected from the inner surface)
- With a small pipe diameter, it is possible to use PEP only with a small contact pad
- The changing geometry of the cutting makes it very difficult to interpret the results.
- Ultrasonic inspection of welded joints made of austenitic materials introduces additional difficulties
Proposed inspection technology:
- Application of phased array technology (digital antenna focusing) with the provision of:
- 100% data recording with reference to the converter coordinate
- Visualization of control data with reference to the 3D model of the control object
- For the application of the technology it is proposed:
- To develop a method of ultrasonic testing, describing:
- Requirements for control equipment (flaw detectors, converters, scanners, software)
- The procedure for setting up the equipment (sensitivity, control zone)
- A link to the quality assessment standards
- To supply control equipment / provide control services

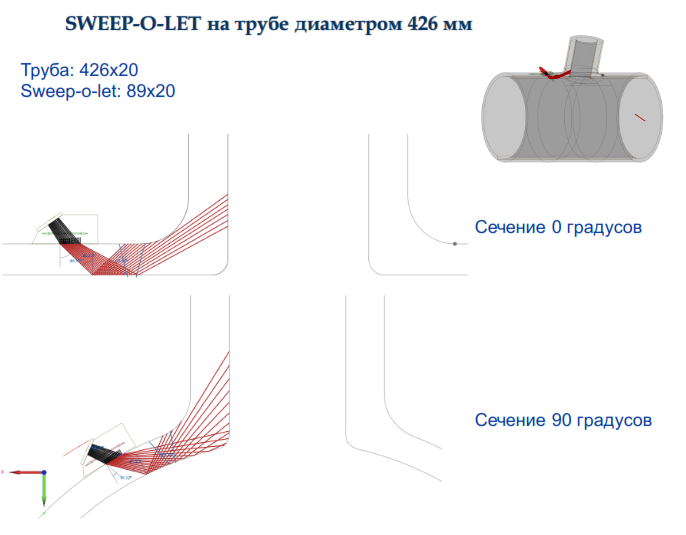
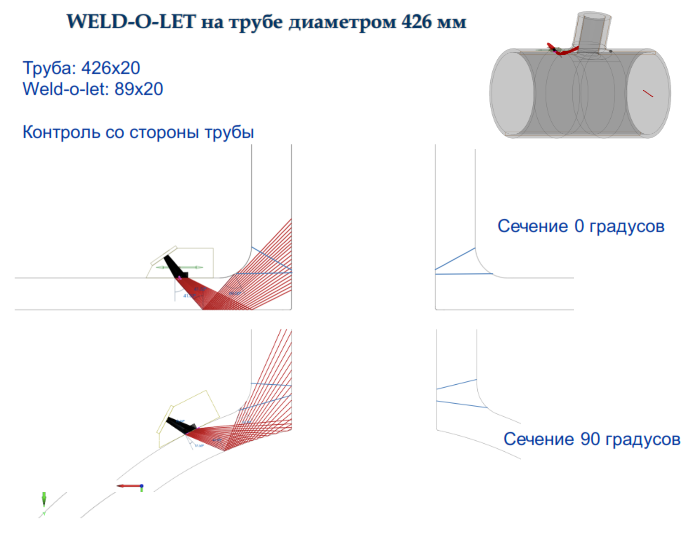
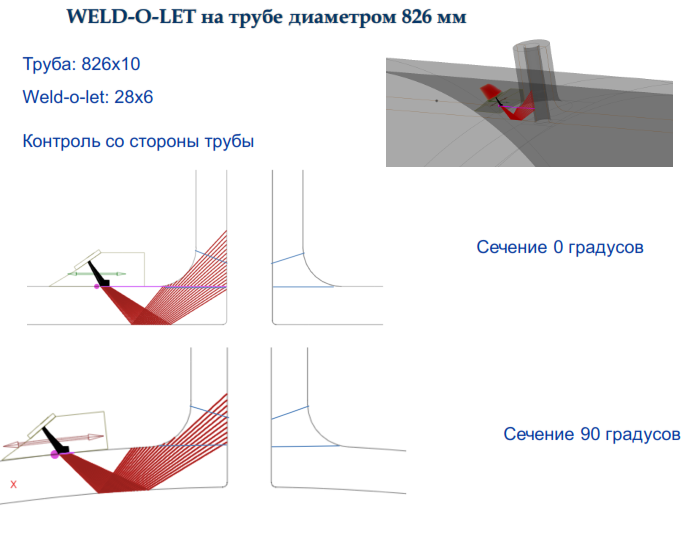
Examples of calculations in the control of ultrasonic phased arrays for various variants of the geometry of the weld:


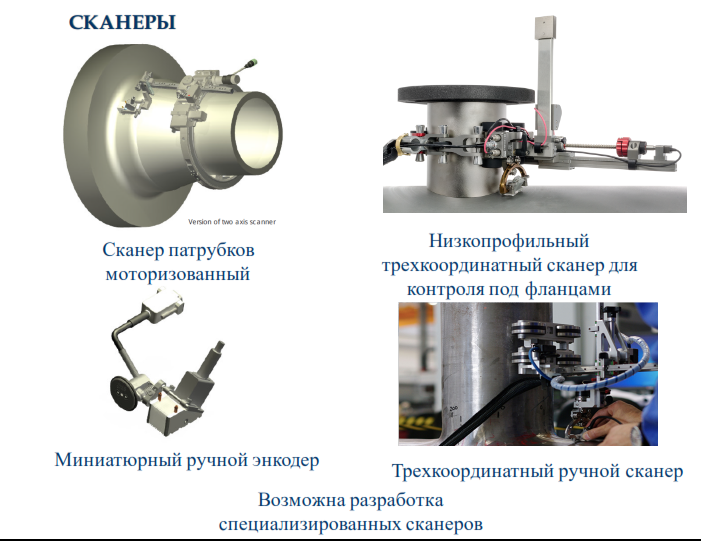
Scanners of various designs, manual, mechanized and automated, can be used for scanning.

Conclusion
- The task of monitoring the welded joints of welded bosses and flanges with full penetration, welding of the necks with a butt seam is solved using phased array technology (digital antenna focusing): for a pipe diameter (shell) of 219 mm or more and a thickness of the welded part of at least 10-12 mm with a diameter of at least 30-50 mm
- For other values of diameters and thicknesses, as well as for austenitic materials, additional studies are needed
- High reliability of control with the use of phased arrays is ensured by:
- Visualization of sections of the control object of complex shape with the use of several sounding schemes at the same time
- Records of control results
- Construction of a 3D model of the controlled object with reference to the results of the control, which facilitates the identification of the identified reflectors
Date: 2 June 2021
File: pdf / 2.82 MB
Language: English Расширенная презентация "ULTRASONIC INSPECTION OF WELDOLETS, WELDOFLANGES AND SWEEPOLETS" DOWNLOAD
File: pdf / 2.82 MB
Language: English Расширенная презентация "ULTRASONIC INSPECTION OF WELDOLETS, WELDOFLANGES AND SWEEPOLETS" DOWNLOAD
Date: 2 June 2021
File: pdf / 1.87 MB
Language: Russian Ультразвуковой контроль сварных соединений приварки фланцев и бобышек приварных (Weld-o-Let и Weld-o-Flance) и вварки горловин (Sweep-o-Let) DOWNLOAD
File: pdf / 1.87 MB
Language: Russian Ультразвуковой контроль сварных соединений приварки фланцев и бобышек приварных (Weld-o-Let и Weld-o-Flance) и вварки горловин (Sweep-o-Let) DOWNLOAD