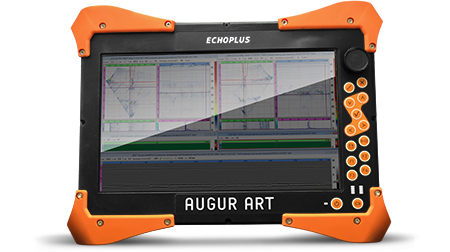
AUGUR ART
Manual multichannel ultrasonic flaw detector using phased array technology, digital antenna focusing and TOFD method
The new AUGUR ART flaw detector is the flagship product of ECHOPLUS, which has absorbed all the experience of the development of the previous six generations of ultrasound control systems, with effective technologies for the use of multi–element converters.
Specifications
- Up to 64 independent channels
- Up to 128 switched channels
- 2 TOFD channels
- 4 combined PEP
- IP66 protection
- Control speed up to 80 mm/s
- Easy integration
- Russian Ultra Sonic modules
- Technologies: FR, CFA, TOFD and conventional PEP
- Up to 16 control groups
- SSD data storage from 128 GB
- Application of complex signals
- Wi-Fi management and data upload to the cloud
- Bright large (13”) screen
Standard equipment
- 32x32 (art. D0190005)
- 32x64 (art. D0190005)
- 64x64 (art. D0190007)
- 32x128 (art. D0190008)
- 64x128 (art. D0190009)
- Battery 2 pcs. (art.D0180006)
- Power supply unit (art. D0180007)
- Charger (art. D0180008)
- Packaging - protected case
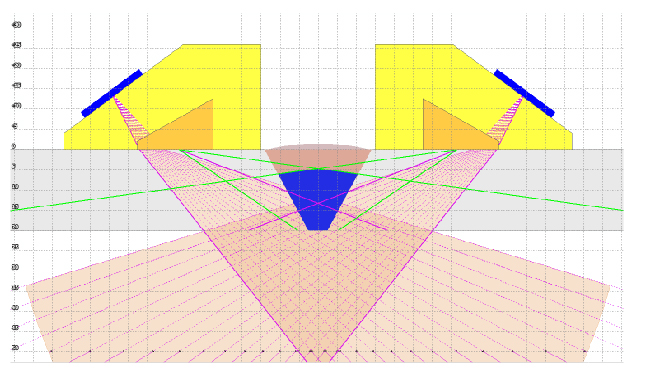
Inspection of welded joints
Manual, mechanized and automated inspection of welded joints using various scanning devices. High-quality images of discontinuities in the inspection object, allowing you to automate the process of determining their type and measuring their dimensions.
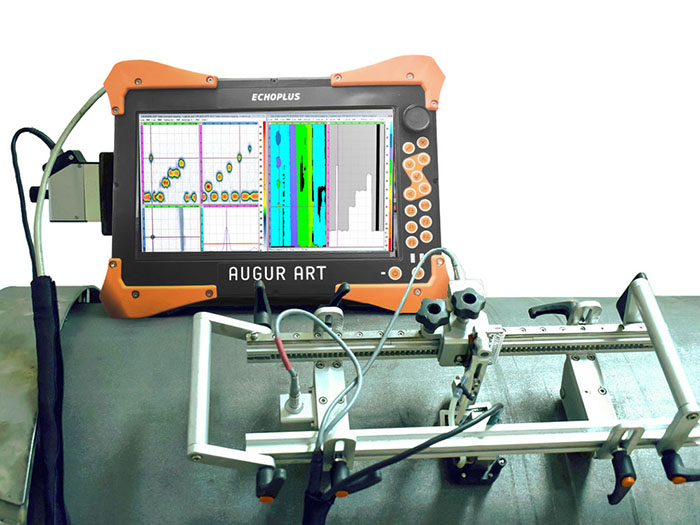
Editor of the parameters of the inspection object
The built-in visual editor allows you to set the parameters of the inspection object (thickness and cutting of the welded joint), select piezoelectric converters, inspection circuits and determine the sounding zone.
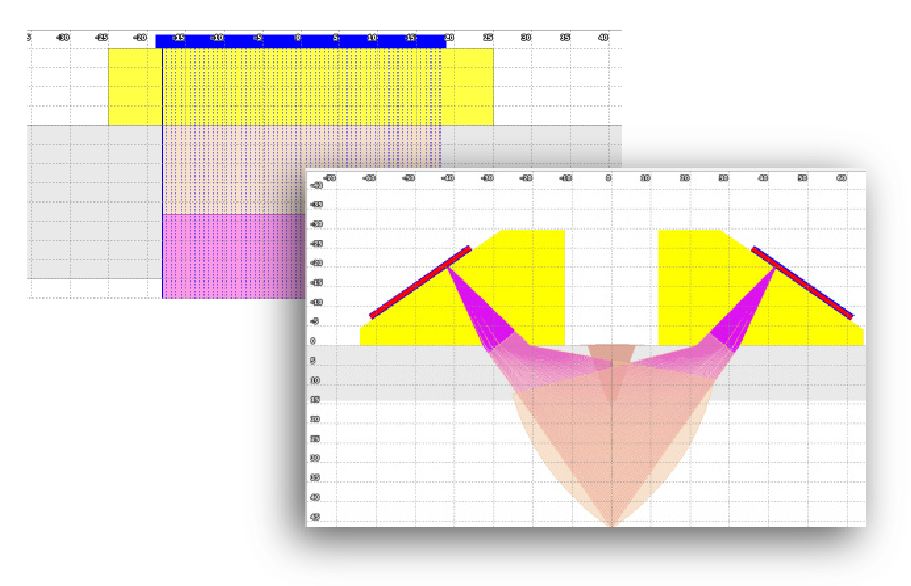
Solid thickness measurement
The technology of continuous thickness measurement using phased arrays allows you to measure the wall thickness and the speed of the ultrasonic wave. The thickness measurement error is no more than 1% in the range from 20 to 100 mm, and no more than 0.2 mm in the range from 2 to 20 mm of thickness.
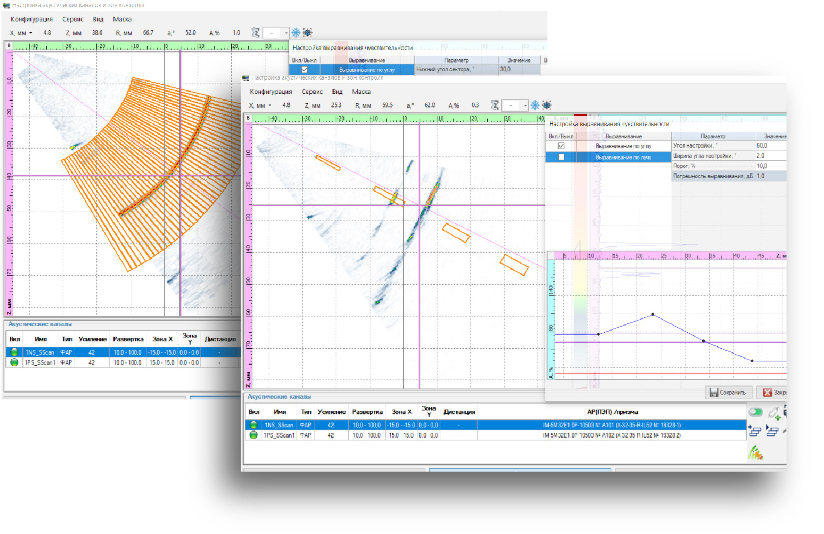
Sensitivity equalization
Alignment of sensitivity by angle and range is supported with the use of standard inspection reflectors: notches, flat-bottomed holes, side drilling holes in accordance with the requirements of Russian and international regulatory documentation, the FR-ARD technology allows you to estimate the equivalent area of the defect
Video: An example of sensitivity equalization used in AUGUR-ART flaw detectors
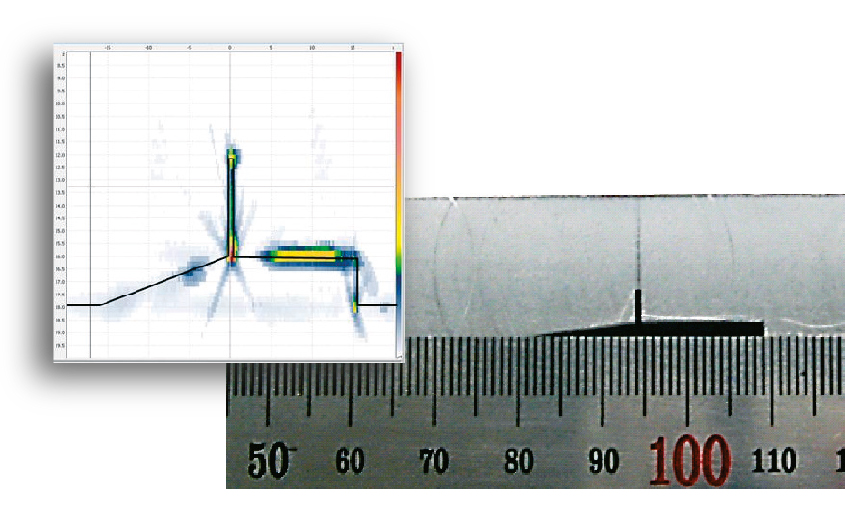
Getting an image of the defect boundaries
AUGUR ART algorithms allow you to obtain B-type images, according to different acoustic schemes, taking into account the reflection from the bottom of the inspection object. After digital processing of these images, the task of obtaining information about the shape of the defect is facilitated.
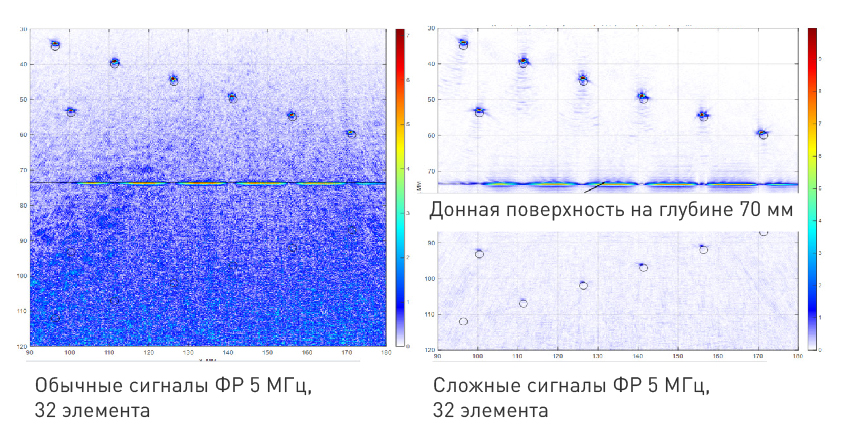
Application of complex signals
The use of complex phase-manipulated signals is realized through the use of a programmable sequencer and subsequent mathematical processing and allows you to improve the image quality when inspection materials with high attenuation coefficients of ultrasound,
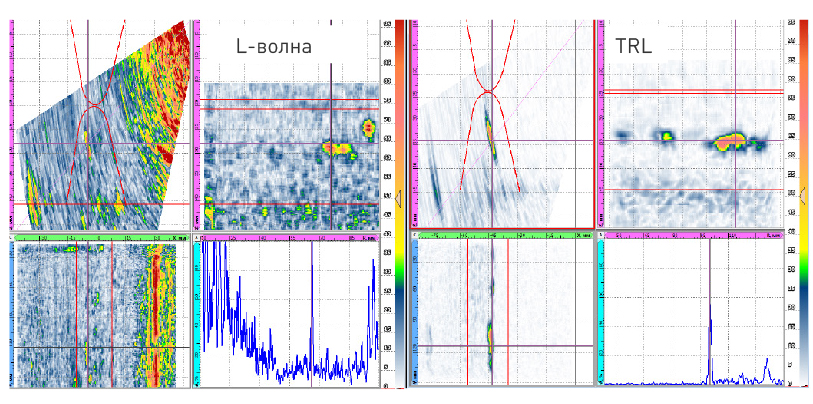
Support for matrices and TRL schemes
To ensure the beam swing in an additional plane and when monitoring materials with a granular structure, it is advisable to use antenna arrays and antenna arrays connected according to a separate combined scheme (TRL), the number of elements in the matrix is determined by the configuration of the flaw detector - from 32 to 128 elements.
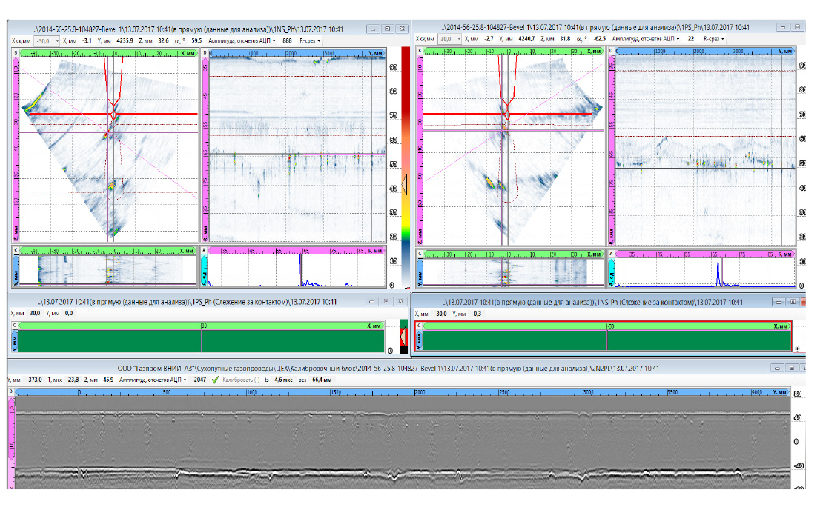
AUGUR-Analysis Program
- A, B, C, D, E, S-scans — visualization and processing in the modes FR, SAFT, CFA, TOFD, linear scanning
- contrast change and cut—offs - sensitivity alignment (RF, RF)
- measuring cursors
- centralized database of inspection results and objects
- creation of reports with inspection parameters and information about defects
Module specifications
| Number of channels FR | 64; 128 pc |
| Number of independent channels FR | 32; 64 pc |
| The range of setting the amplitudes of the excitation pulses FR | from 30 to 100 V |
| The range of setting the amplitudes of the excitation pulses TOFD |
from 50 to 400 V |
| The range of setting the duration of the excitation pulses |
from 50 to 400 ns |
| Permissible deviation of the setting of the duration of the excitation pulses | ±10 % |
| The range of adjustment of the gain of the receiving path | от 0 до 80 dB |
| Gain adjustment step |
не более 0,1 dB |
| Limits of the permissible absolute error of measuring the ratio of signal amplitudes at the receiver input | ±1 дБ |
| Operating frequency band |
from 0,4 до 25 MHz from 0,5 до 21,6 MHz |
| The range of adjustment of the duration of the sweep | from 1 to 600 мcs |
| Configurable FIR filters | For each channel |
| Maximum number of focus groups / laws | 16 / 2048 |
| Maximum frequency of sending excitation pulses | 20 kHz |
| Data collection and recording speed | up to 200 Mb/s |
Accuracy specifications
| The range of measuring the depth of the defect | from 1 to 200 mm |
| The limits of the permissible absolute error in measuring the depth of the defect, provided that the value of the aperture angle * α, related to the length of the ultrasonic wave λ is at least 5 degrees / mm; | ±0,8 mm |
| The limits of the permissible absolute error in measuring the depth of the defect, provided that the value of the aperture angle * α, related to the length of the ultrasonic wave λ is less than 5 degrees / mm | ±(0,3+0,03*z) mm, z - depth value, mm |
| The range of measuring the distance from the point of entry of ultrasonic vibrations to the projection of the defect on the surface | from 1 to 120 mm |
| The absolute error of measuring the distance from the point of entry of ultrasonic vibrations to the projection of the defect on the surface, provided that the value of the aperture angle * a, related to the length of the ultrasonic wave λ is at least 5 degrees / mm; | ±1,0 mm |
| The absolute error of measuring the distance from the point of entry of ultrasonic vibrations to the projection of the defect on the surface, provided that the value of the aperture angle * a, related to the length of the ultrasonic wave λ is less than 5 degrees / mm | ±(0,3+0,03*z) mm, z - distance from the insertion point to the defect projection, mm |
| The measurement range of the distance traveled by the path sensor |
from 1 to 20000 mm |
| Relative error of measuring the distance traveled by the path sensor in the range from 1 to 100 mm | ±0,5 % |
| The relative error of measuring the distance traveled by the path sensor in the range from 100 to 20000 mm | ±0,5 % |
Other specifications
| Display Parameters |
13,3“, 1920x1280, contrast 1000:1, touch 13.3“, 1920x1080, contrast 1000:1, touch |
|
Overall dimensions of the flaw detector (length x width x height) |
not more than 400 x 300 x120 mm not more than 400 х 300 х135 mm |
|
Weight of the system unit |
up to 7 kg |
| Degree of industrial protection with plugged connectors | IP66 |
|
Average service life |
at least 10 years |
| The power is supplied from an external DC power source (from a rechargeable battery or a power supply connected to the AC network) | 9-18 V |
| Battery life | 4 hours + hot swap |
